Pot of gold - papier mache jewelry bowl

Ok, I am not a leprechaun, not even Irish and as much as I'd like to, I don't own a pot of gold. But I have a golden pot. Actually I made  a golden pot myself in the easiest  way possible. I need to store my continuously growing rings and bracelets collection and it turned out perfect for this purpose. The technique that I used is called papier mache and you've probably at least heard of it, if not even tried it in school. It's really simple but the result is quite amazing.


Here are some tools and supplies that you'll need:


1. You will use the bowl as a mould, but you'll have to cover it up in platic wrap because you don't want your paper to stick to the actual bowl
2. Rip a newspaper in 2 cm wide strips
3. Take a strip of paper and using a paint brush, apply mod podge on one side then stick in on the bowl and apply another layer of mod podge. Continue doing this, applying a full radial layer of strips, then continue with a circular layer. It's like creating a crisscross with the strips. You will need to add at least 5 alternating layers to get a stiff result. But you can go up to 10, the more the better.
4. Let it dry over night
5. Next day, carefully remove the papier mache bowl from the actual bowl
6. The plastic wrap should come off easily
7. Trim the edges
8. Paint it


I have the best golden acrylic paint so I had to use it for this. I hope you like it and I really want to see how yours turns out, so please feel free to comment or leave a photo with your papier mache project.

Love,
L.

Sunday Smoothie: Peaches&Mango

I've been waiting for peaches forever. They are my second favorite summer fruits, after watermelons. And when they finally hit the market stands I grabbed a handful of them and threw them in the blender. So I've made a peach-mango smoothie for today.


Ingredients: 2 peaches chopped, 1 mango chopped, 1 cup sweet yogurt, 2 spoons honey


Have a peachy Sunday!
Love,
L

Happy Birthday to me!!

I was looking through my old posts and I just realized that to day is MACTED's one year anniversary. YEY!
So happy birthday to me and to all my beautiful readers. Thank you all for following us.
Love,
L.

Midi Rings

Last winter the internet was packed with midi rings. You know, those little cute rings that sit right above your knuckle...adorable!! I was looking everywhere for them but never found some cheap ones. And I couldn't buy some gold ones because I tend to loose every ring I wear, especially if it's so tiny. So I'm quite embarrassed to admit, but after 6 months I realised I can make some myself. And not just some, but hundreds.


Here is what you need:


The steps are quite easy to follow and it takes 2 - 5 minutes to complete a ring.


1. take an object that's the size of your finger - more precise, the size of the part of the finger where you want your ring to sit - and wrap the wire around it one time
2. cut both strands of wire in the same place
3. now you've got something like a jump ring; you can leave it like that for a simple ring
4. or go further and add a small gold bead; add a very small amount of superglue on the wire ends and slide the bead over them to cover opening


So cute, right? I need to buy more wire 'cause I can't stop making these.

Love,
L.

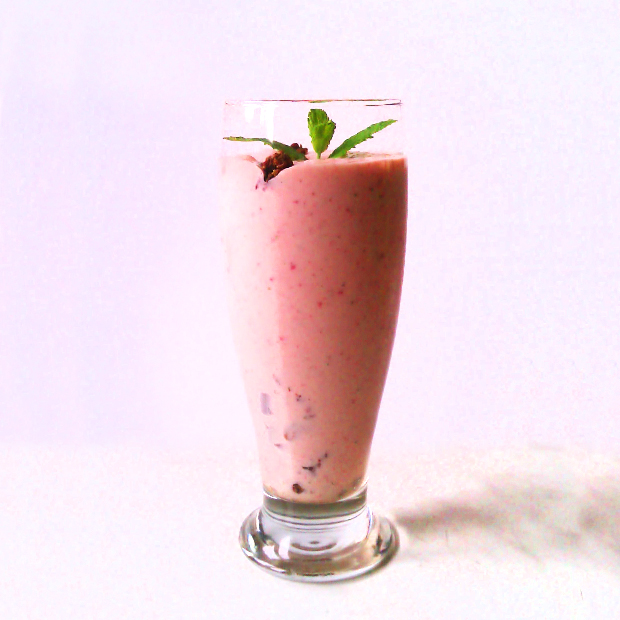
Sunday Smoothie: Summertime Happiness

I'm sure that if Lana would have tasted this smoothie her song would have been called summertime happiness. Ok, I'm bragging, but really, this smoothie is crazy yummy and so perfect for a hot summer day. It has all those summer-ish ingredients.


Ingredients: one cup strawberries, one banana, two scoops vanilla ice cream, two spoons honey, 5 mint leaves, one cup sweet yogurt.


Enjoy your Sunday!
Love,
L.

PS.: I'm sorry for the quality of the photos, I forgot my camera charger at my parents house and had to shoot with my little phone.


Graphic wedges

I bought these wedge sandals last autumn, at the flea market and never got the chance to wear them. Still can't because the sandals weather is not here yet, but I decided to get them ready for the mid summer and make them more interesting and color the rope wedge.


This is again one of those tutorial that is not quite a tutorial because it's so easy. It's more an idea, but you still need some supplies:


Before you start, you should really work in a well ventilated area. I found myself a little woozy when I was done from the permanent markers.


1. Try the markers on a paper and find the perfect combination for you
2. Start coloring the wedge, creating a pattern; be creative!


Now pamper your feet in these crazy beauties!

Love,
L.

Sunday Smoothie: Avocado & Banana

After a couple of crazy combos it is time to get back to a classic. So this Sunday we have the avocado and banana smoothie. One thing I discovered drinking this one is that the avocado really enhances the banana. So you won't feel the avocado very but, but rather a buttery banana taste


Ingredients: 1 avocado chopped, 1 banana, 1 cup sweet yogurt, 2 tablespoons honey


Enjoy your Sunday,
L.
Pin It button on image hover